
<
Previous Month
|
Next Month
>
©2024 Electronic Arts Inc. All rights reserved.
All trademarks are property of their respective owners.

NEW User Agreement NEW Privacy & Cookie Policy Online Safety Contact Us
EA Swiss Sàrl, Place du Molard 8, 1204, Geneva, Switzerland. Geneva Companies Registration number: CH-660-2328005-8

 |
You can now claim your 1000 FREE Simpoints to spend at the Sims 3 Online Store. Don't forget to download Riverview, your FREE new town! |

 |
You have full access to all the community features. |
|
You have full access to all the community features. |
 |
You have full access to all the community features. |
|
You have full access to all the community features. |
|
You have full access to all the community features. |
 |
You can now claim your 1000 FREE Simpoints to spend at the Sims 3 Online Store. Download your Collector's Edition exclusive item now! Don't forget to download Riverview, your FREE new town! |
 |
Use your $10 worth of FREE SimPoints to shop for EXCLUSIVE content at The Sims 3 Store. And don't forget your FREE* new town! Expand your game even more with this free download. Download your FREE Explorer''s loot now! Prepare your Sims for adventures with helpful maps, exotic Egyptian furniture, and more. |
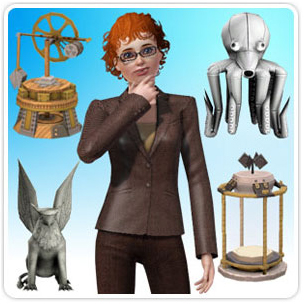 |
Download your The Ultimate Career Bundle now! Unlock exclusive new hairstyles as a stylist, invent gadgets as an inventor, create works of art as a sculptor, and play new cases as a private detective! |
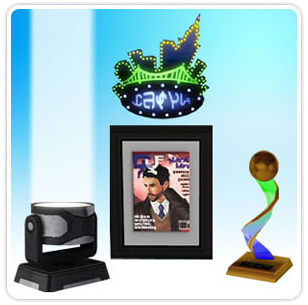 |
Download your FREE Red Carpet Collection now! Exclusive items to deck out your town and your Sims'' home, Hollywood-style. |
 |
Download your FREE* The Sims 3 Generations Registration Gifts now! With Generations, Sims of every age can enjoy new activities! Kids can hang out with friends in tree houses. Teens can pull hilarious pranks. Adults can suffer midlife crises. And so much more! |
 |
 |
Download your FREE* Freestyle DJ Booth now! With the Freestyle DJ Booth, your Sims can moonlight in the evenings by spinning tunes. Keep the crowds fist pumping all night long and you’re sure to be a hit. |
 |
Download your FREE* Plants vs. Zombies Fan Pack now! Now your Sims can proudly display their love of the classic game Plants vs. Zombies with a Plants vs. Zombies t-shirt and poster. |
 |
Download your FREE* Seasons Wall Decal Pack now! Now your Sims can proudly liven up your blank walls and decorate with your favorite seasonal theme. |
 |
Download your Mascot Attack Pack now! Whether your loyalties lie with the Fighting Llamas or the Walloping Kangaroos, you’ll want to wear your mascot on your … er, wall. Which you can do with this mascot set! |
 |
Download your Tropical Waters Hat Pack now to set a festive tropical mood! You can be the most eye-catching chica or chico on the beach with the towering fruit hat, or be the partay captain with the boat captain''s hat! |
 |
Download your Cosmic Cosmetics Bundle now! Look both fascinating and alluring when wearing any of these cosmically inspired cosmetics! |
You must be a game-registered user to use certain community features.
Purchase one of our games by visiting your local retailer or by browsing our Games Page.
Already own a Sims 3 game? Please register your game and get full access to the site's features.
Origin brings an entire universe of gaming into a single, convenient application. Downloads are streamlined for quick and easy installation, and you can securely purchase and play your favorite games any time and any place you want. You can even chat with your friends right from the Origin application while you play. New features recently added to Origin include live streaming demos, free-to-play games, and a beta cloud storage feature. For gamers on the go, Origin services are also available on your mobile device!
If you already have an EA Account, you can log in to TheSims3.com with your EA ID to create a persona name for The Sims 3 Community.
The email you have entered has already been used to create account with EA.
Some possible reasons are:
To access your account, please login by clicking the link below.
Please enter your date of birth or login:
We need to check your age to ensure that we adhere to our commitment to market our products responsibly.